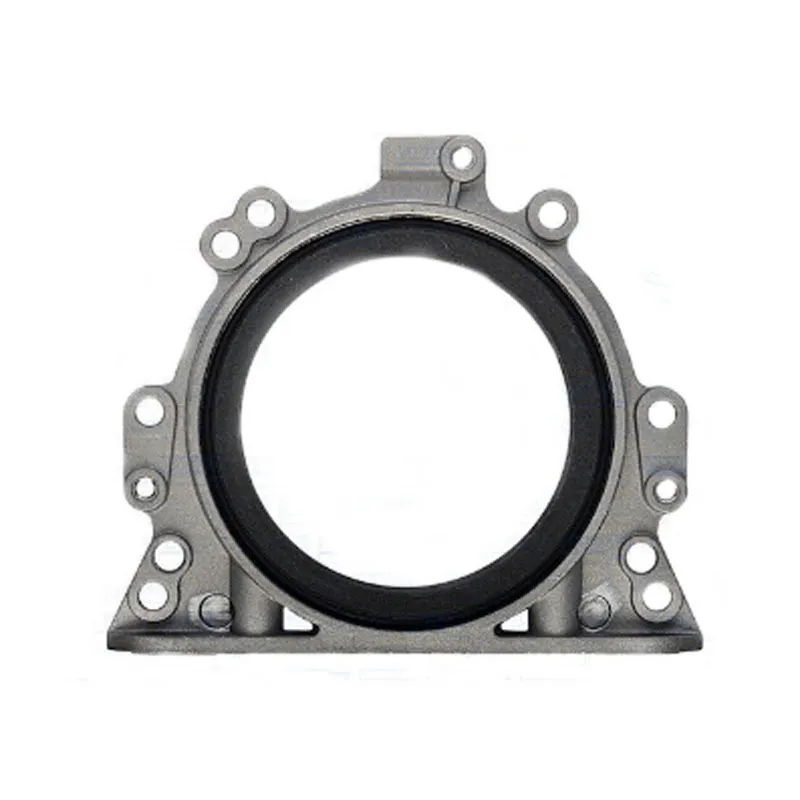
Steps to Replace a Crankshaft Seal Effectively and Efficiently
Replacing a Crankshaft Seal A Comprehensive Guide
The crankshaft seal is a critical component in your vehicle's engine, responsible for preventing oil leaks from the crankshaft. Over time, these seals can wear out or become damaged, leading to oil leaks that can cause serious engine problems if not addressed promptly. Replacing a crankshaft seal is a task that can be undertaken by someone with basic mechanical skills and the right tools. In this article, we’ll take an in-depth look at the signs that indicate a failing crankshaft seal, the replacement process, and tips for ensuring a successful repair.
Signs of a Failing Crankshaft Seal
1. Oil Leaks The most obvious sign of a problematic crankshaft seal is the presence of oil leaks. You may notice oil dripping from the area where the crankshaft connects to the engine block. Look for oil puddles on the ground underneath your car or oil stains on the engine itself.
2. Low Oil Levels If you frequently find yourself adding oil between oil changes, it could be due to a leaking crankshaft seal. Monitor your oil levels regularly to catch any discrepancies early.
3. Oil Odor A burning oil smell can indicate that oil is leaking onto hot engine components. If you notice a strong odor, it's time to check for potential leaks.
4. Engine Performance Issues In some cases, a faulty crankshaft seal can lead to decreased engine performance or increased emissions. This can be due to improper oil lubrication or contamination of engine components.
Tools and Materials Needed
Before starting the replacement process, ensure you have the following tools and materials - Basic hand tools (wrenches, sockets) - Screwdrivers - Oil catch pan - New crankshaft seal - Seal installer tool (optional but recommended) - Engine lubricant - Safety glasses and gloves
Steps to Replace the Crankshaft Seal
1. Preparation Begin by parking your vehicle on a level surface and turning off the engine. Allow it to cool completely. Disconnect the negative battery terminal to prevent any electrical issues.
replacing crankshaft seal

2. Drain the Oil Place an oil catch pan under the oil pan and remove the oil drain plug to drain the engine oil completely. This step is crucial to prevent spills during the seal replacement.
3. Remove the Harmonic Balancer Depending on your vehicle, you may need to remove the harmonic balancer to access the crankshaft seal. Use a puller tool to carefully detach the balancer from the crankshaft.
4. Remove the Old Seal With the balancer out of the way, you can now access the crankshaft seal. Use a seal puller or a flathead screwdriver to carefully pry out the old seal. Be cautious not to damage the surrounding components.
5. Clean the Surface Before installing the new seal, clean the seal seating area thoroughly. Remove any debris, old sealant, or dirt that may interfere with the new seal's installation.
6. Install the New Seal Apply a small amount of engine oil around the lip of the new seal to ensure a proper fit. Use a seal installer tool or carefully tap the new seal into place using a rubber mallet. Ensure it's seated evenly and flush with the engine block.
7. Reassemble the Components Reattach the harmonic balancer and torque it to the manufacturer’s specifications. Reinstall the oil drain plug and reconnect the negative battery terminal.
8. Refill Engine Oil Pour new engine oil into the oil fill cap and check the level with the dipstick to ensure it is at the correct level.
9. Start the Engine After completing the installation, start your engine and look for any signs of oil leaks around the new seal. Allow the engine to reach operating temperature and check again.
10. Check Oil Levels Monitor the oil level after a few days of driving to ensure the new seal is functioning correctly.
Conclusion
Replacing a crankshaft seal might seem daunting, but with the right tools and some mechanical know-how, it can be a manageable task. Addressing oil leaks caused by a faulty crankshaft seal is essential to maintaining engine health and preventing costly repairs. By following the steps outlined in this guide, you can ensure a successful crankshaft seal replacement and keep your vehicle running smoothly for miles to come. Always remember to consult your vehicle’s service manual for specific instructions and torque specifications related to your make and model.
-
The Ultimate Guide to Boat Propeller Bearings and Trailer Wheel Bearings
News Jul.31,2025
-
The Essential Guide to Marine Bearings and Boat Trailer Wheel Bearings
News Jul.31,2025
-
The Complete Guide to Heavy Duty Seals: Protecting Doors and Spaces Efficiently
News Jul.31,2025
-
Essential Guide to Marine Shaft Bearings and Boat Trailer Axle Bearings
News Jul.31,2025
-
Comprehensive Guide to Marine and Trailer Bearings for Safe Boating and Transport
News Jul.31,2025
-
Comprehensive Guide to Automotive Oil Seals: Protecting Your Engine and Shafts
News Jul.31,2025
-
Understanding Automotive Oil Seals: Essential Components for Engine and Shaft Protection
News Jul.30,2025
Products categories


