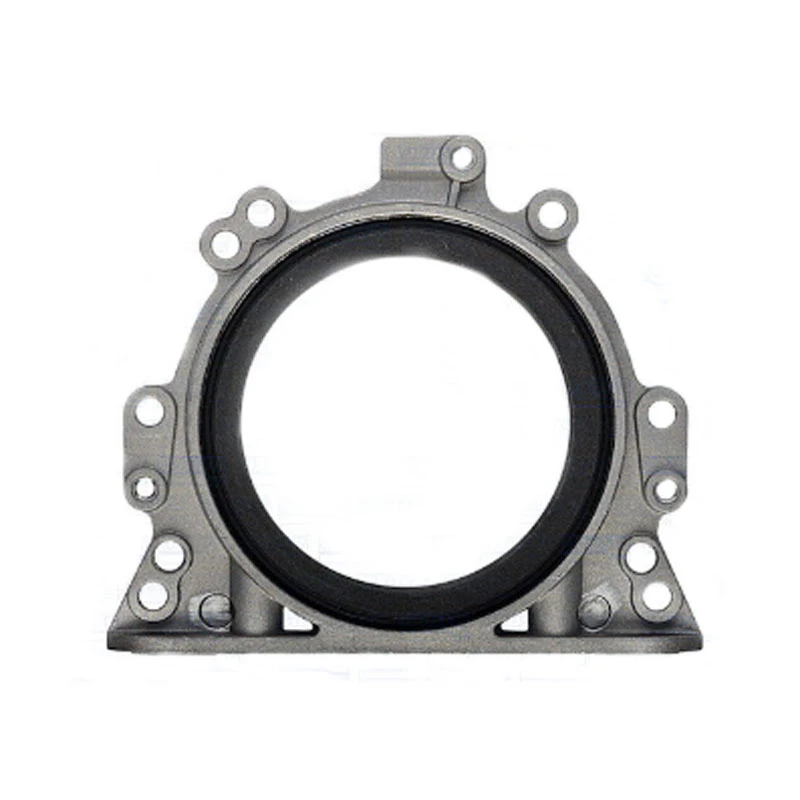
crankshaft seal replacement
Understanding Crankshaft Seal Replacement A Comprehensive Guide
The crankshaft seal, an essential component in any internal combustion engine, plays a critical role in maintaining the engine's integrity. It prevents oil leaks from the crankshaft, which could lead to significant engine damage if left unaddressed. If you're facing oil leaks or have noticed oil pooling beneath your vehicle, it may be time to consider a crankshaft seal replacement. This article will guide you through the essentials of understanding, diagnosing, and replacing the crankshaft seal.
The Role of the Crankshaft Seal
The crankshaft seal is designed to keep engine oil contained within the engine, preventing it from leaking out. The seal sits at either end of the crankshaft – one at the front where the crankshaft connects to the timing belt and another at the back where it connects to the flywheel. If the seals begin to wear out due to age or exposure to heat and contaminants, engine oil can start to seep out, leading to low oil levels and potentially serious engine issues.
Symptoms of a Failing Crankshaft Seal
Recognizing the symptoms of a failing crankshaft seal early can save you from costly repairs down the line. Common signs include
1. Oil Leaks Puddles of oil under the vehicle are the most noticeable sign. If you see oil collecting on your driveway or garage floor, a seal replacement might be necessary. 2. Oil in the Engine Compartment If you notice oil splattering in the engine bay, it's likely that the crankshaft seal is compromised.
3. Decreased Oil Levels Frequent oil top-ups can indicate a leak, which might stem from the crankshaft seal.
4. Burning Oil Smell A failing seal can allow oil to leak onto hot engine components, producing a burnt oil smell.
5. Engine Performance Issues Significant oil loss can lead to inadequate lubrication, resulting in decreased performance and potential engine damage.
Diagnosing the Problem
If you suspect a crankshaft seal issue, the first step is to confirm the diagnosis. You can perform a visual inspection for oil leaks around the crankshaft area, but this can be difficult without proper tools. A mechanic may use a more detailed approach, including
- Oil Pressure Testing Low oil pressure can indicate a leak.
crankshaft seal replacement

- Dye Test A fluorescent dye added to the oil can highlight leaks when viewed with a UV light.
The Replacement Process
Replacing a crankshaft seal involves several steps and requires mechanical skill. Here’s a general outline of the process
1. Preparation Ensure the engine is cool. Disconnect the battery and drain the engine oil.
2. Access the Seal Depending on the vehicle, you'll need to remove components like the timing belt or flywheel to gain access to the crankshaft seal.
3. Remove the Old Seal Carefully extract the old seal using a seal puller or a flat tool, ensuring you do not damage surrounding components.
4. Clean the Area Before installing the new seal, clean the area thoroughly to remove any debris or old oil.
5. Install the New Seal Lubricate the new seal’s lip with a bit of oil and gently press it into place. Be sure to use the proper installation tool to avoid damaging the seal.
6. Reassemble Reinstall any components you removed and reconnect the battery.
7. Check for Leaks Once everything is back together, start the engine and observe for any signs of oil leaks.
Conclusion
Crankshaft seal replacement is a vital maintenance task that, if neglected, can lead to significant engine problems. Regularly checking for signs of oil leakage and staying proactive about your vehicle's maintenance can prolong the life of your engine. If you're uncomfortable performing the replacement yourself, don't hesitate to consult a professional mechanic. Keeping your crankshaft seal in good condition is essential for ensuring a healthy and efficient engine. Taking care of this small but crucial component can save you time, money, and headaches in the long run.
-
The Ultimate Guide to Car Repair Kits: Tools and Essentials Every Driver Should Own
News Aug.01,2025
-
The Complete Guide to Oil Pan Gaskets: Sealing Engine Leaks the Right Way
News Aug.01,2025
-
Preventing Oil Leaks: A Complete Guide to Oil Pan Gaskets and Drain Seals
News Aug.01,2025
-
Everything You Need to Know About Oil Pan Gaskets and Drain Plug Seals
News Aug.01,2025
-
Essential for Car Owners: How to Use a Car Repair Kit to Deal with Minor Breakdown
News Aug.01,2025
-
Comprehensive Guide to Engine Oil Sump Gaskets and Related Seals
News Aug.01,2025
-
The Ultimate Guide to Boat Propeller Bearings and Trailer Wheel Bearings
News Jul.31,2025
Products categories


