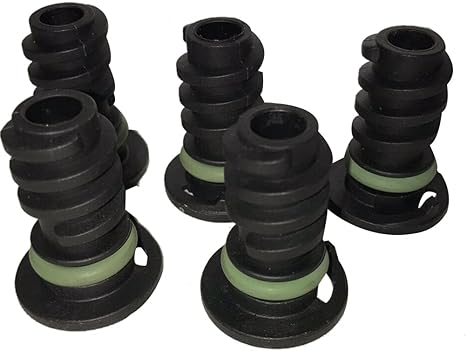
changing oil filter housing gasket
How to Change the Oil Filter Housing Gasket A Comprehensive Guide
Changing the oil filter housing gasket is a vital maintenance task for many vehicle owners. This gasket is responsible for sealing the oil filter housing to the engine, preventing oil leaks that can lead to serious engine damage. In this article, we will take you through the step-by-step process of replacing the oil filter housing gasket, ensuring that you can perform this task with confidence.
Understanding the Oil Filter Housing Gasket
Before diving into the replacement process, it's essential to understand what the oil filter housing gasket does. It is a critical component that maintains the integrity of the oil system by creating a seal between the oil filter and the engine. Over time, due to heat, pressure, and engine vibrations, this gasket can deteriorate, leading to leaks. Identifying a leak early can save you from costly repairs down the line.
Tools and Materials Needed
To change the oil filter housing gasket, you will need the following tools and materials
- Socket set - Torque wrench - Oil filter wrench - Gasket scraper or putty knife - Clean rags - New oil filter housing gasket - Engine oil - Oil catch pan - Safety gloves and goggles
Step-by-Step Process
1. Preparation Begin by gathering all the necessary tools and materials. Choose a working area with good lighting and accessibility to your vehicle. Ensure the engine is cool before you start working to prevent burns.
2. Safety First Wear safety gloves and goggles to protect yourself from oil and dirt. Place an oil catch pan under the oil filter to catch any spilled oil.
changing oil filter housing gasket

3. Remove the Oil Filter Using the oil filter wrench, remove the oil filter from its housing. Be prepared for oil to spill out, so ensure your catch pan is in place. Assess the condition of the old filter and replace it if necessary.
4. Locate the Oil Filter Housing Gasket The gasket is typically located between the engine and the oil filter mount. Depending on your vehicle model, you may need to remove additional components to access it.
5. Remove the Oil Filter Housing Using a socket set, carefully unbolt the oil filter housing. Be sure to keep track of the bolts as you remove them. Once the bolts are removed, carefully pull off the housing. You may need to wiggle it slightly to free it from the engine.
6. Clean the Surfaces After removing the housing, take the gasket scraper or putty knife and carefully remove any remnants of the old gasket from both the oil filter housing and the engine surface. Ensure the area is clean to allow for a proper seal with the new gasket.
7. Install the New Gasket Place the new oil filter housing gasket onto the housing. Make sure it is aligned correctly and seated properly. If necessary, refer to your vehicle’s service manual for specific positioning.
8. Reattach the Oil Filter Housing Position the oil filter housing back onto the engine. Hand-tighten the bolts first before using the torque wrench to tighten them to the specified torque in your vehicle’s service manual.
9. Replace the Oil Filter Install the new oil filter by following the manufacturer's instructions. Ensure it is securely attached to prevent future leaks.
10. Check Your Work After reassembling everything, start your engine and let it run for a few minutes. Check for any leaks around the oil filter housing. If you notice any leaking oil, you may need to recheck the gasket installation.
Conclusion
Changing the oil filter housing gasket is an achievable task for most DIY enthusiasts. By following these steps, you can ensure that your vehicle maintains optimal oil flow and performance. Regular maintenance not only extends the life of your engine but also enhances your vehicle’s reliability. If you’re ever in doubt, don’t hesitate to consult a professional mechanic. Happy wrenching!
-
Understanding Automotive Oil Seals: Essential Components for Engine and Shaft Protection
News Jul.30,2025
-
The Importance of Heavy Duty Seals in Industrial and Residential Applications
News Jul.30,2025
-
Exploring Industrial Oil Seals: From Felt Oil Seals to TTO and CFW Solutions
News Jul.30,2025
-
Essential Guide to Oil Seals: From Radial to Metal-Cased Seals for Industrial Reliability
News Jul.30,2025
-
Choosing the Right Oil Seals and Gaskets for Industrial and Automotive Applications
News Jul.30,2025
-
Cassette Seals: Durable Sealing Solutions for Harsh Environments
News Jul.30,2025
-
Understanding the Front Main Engine Seal: Purpose, Maintenance, and Installation
News Jul.29,2025
Products categories


