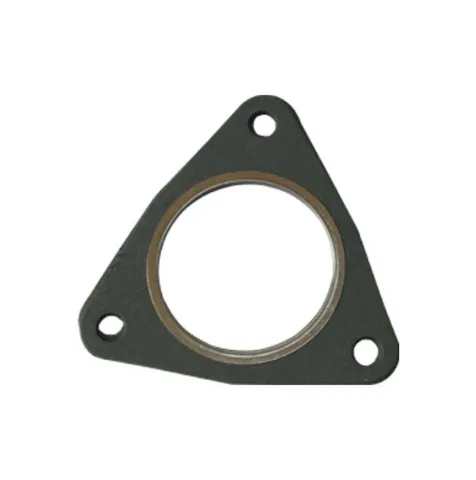
How to Diagnose and Replace an Oil Filter Housing Gasket Leak in Your Engine
An oil filter housing plays a critical role in your car’s lubrication system. It securely holds the oil filter in place and helps route oil to and from the filter. Over time, issues like a oil housing gasket leak, oil housing seal failure, or damage to the oil pan housing gasket can lead to serious engine problems if not properly addressed. This article will walk you through how to diagnose these problems and explain the process of replacing oil filter housing components and the oil filter housing gasket.

Understanding Oil Leaks from the Filter Housing
An oil housing gasket leak is one of the most common oil-related issues in modern engines. This leak typically occurs at the connection between the oil filter housing and the engine block. The gasket in this location is responsible for sealing the joint and preventing oil from leaking out.
Over time, heat cycles and pressure fluctuations can cause the oil housing seal to harden, crack, or deteriorate. Once the seal is compromised, oil will seep through the edges and may drip onto other engine components like the serpentine belt or alternator, leading to further damage.
In some engines, particularly V-type engines (V6, V8), the oil pan housing gasket may also be affected due to its proximity to the filter housing. A leak here can compound oil loss and make diagnosis tricky, as multiple components may appear wet with oil.
Symptoms and Diagnosis of a Housing Gasket Leak
The most telling sign of a oil housing gasket leak is visible oil on the engine block, under the oil filter housing, or pooling beneath your vehicle after parking. You may also notice:
Burning oil smell (from oil dripping onto hot engine parts)
Low oil level between changes
Check engine or oil pressure warning lights
Oil-stained or degraded belts and hoses
To confirm the source of the leak, perform a visual inspection. Remove the engine cover and check the area around the oil filter housing seal. Look for oil residue collecting around bolts or seams. A mechanic might use a UV dye and black light to trace the exact origin of the leak.
If the oil seems to be leaking lower on the engine, inspect the oil pan housing gasket as well, since leaks can travel downward and make the source difficult to identify.
Replacing the Oil Filter Housing and Gasket
Replacing oil filter housing components is not overly complex, but it does require time and precision. It’s crucial to ensure the new gasket is properly seated and torqued to spec. Here’s a general step-by-step breakdown:
Tools & Supplies Needed:
Socket and ratchet set
Torque wrench
Screwdrivers
Gasket scraper or razor blade
Brake cleaner or degreaser
Replacement oil filter housing gasket
Replacement oil filter housing (if damaged)
Engine oil and filter (for refill)
Steps for replacing oil filter housing gasket:
Allow the engine to cool and disconnect the battery to prevent accidental starts.
Drain the engine oil by removing the drain plug and oil filter.
Remove components obstructing access to the filter housing. This may include intake manifolds, throttle bodies, or cooling lines.
Unbolt the oil filter housing from the engine block carefully.
Clean the mounting surface thoroughly. Remove all residue of the old oil housing seal or gasket using a scraper and degreaser.
Install the new gasket, ensuring it is seated evenly. If you are replacing oil filter housing, install the new housing with the gasket in place.
Torque the bolts to the manufacturer’s specifications to avoid cracking the housing or creating future leaks.
Reinstall removed components, install a new oil filter, and refill the engine with oil.
Start the engine and inspect for leaks.
Addressing an oil housing gasket leak promptly can prevent more severe issues such as oil starvation or engine failure. Whether you’re fixing the oil housing seal, the oil pan housing gasket, or going as far as replacing oil filter housing, careful inspection and correct installation are key to long-lasting results.
If you’re unsure about any step or if the leak appears severe, it’s always wise to consult with a professional mechanic.
-
Seal 12x20x5: Precision Radial Shaft Seals for Industrial Reliability
Labarai Nov.24,2025
-
Seal 12x18x5: Essential Guide to Specifications, Applications & Vendors
Labarai Nov.24,2025
-
Understanding Seal 12 20 5: Applications, Specifications & Industry Insights
Labarai Nov.23,2025
-
Durable Oil Seal 85x110x12 – Reliable Sealing Solutions for Industry
Labarai Nov.23,2025
-
Durable and Precise Oil Seal 75x95x10 for Efficient Machinery | YJM Seal
Labarai Nov.22,2025
-
Durable Oil Seal 75x100x10 for Reliable Industrial Performance | YJM Seal
Labarai Nov.22,2025
-
High-Quality Oil Seal 65x90x10 | Durable & Reliable Sealing Solutions
Labarai Nov.22,2025
Rukunin samfuran


